Monday, 23 July 2012

24th, 25th July

Tools:- hammer, punch, level, hand saw, 8m tape, pencil, cordless drill


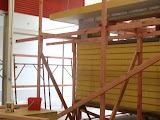
Today helped build the wooden scaffold.


Then carried on with the wall clading. Running a level down the wall, where a stud is, marking down with a pencil, then measuring 40mm up, then marking with a cross. These holes are pre-drilled to stop the sliting of the weather boards when nailing them. The nails were then punched in.


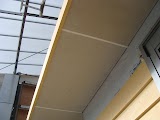
Also helped finish of the soffit. Going into the corner.


Then we started measuring and cutting the sills out. First we measured the window or door frame -20 [for the overlap board on the frame] + 130 [65mm for the board] + 36 [2x 18mm] and + 80 [2 x 40mm]

Sunday, 22 July 2012

23rd July

Tools used: hammer, level [long & 1m], 8m tape, 1m folding rule, radial saw, hand saw, stapal gun, chalk line

safety equipement: ear muffs, safety boots
   
Today I started on the wall clading.
I did between 2 windows, measuring [5 to 20mm of from the inside window frame] and cutting [on the radial saw] priming the ends, then tacking each board up along the chalk line. This was repeated until just below the top of the window frame.


After 12pm were shown how to put a window in.
  • checked the frame was level
  • because the bottom sill flashing has a lip we put packers up in line with the lip
  • then using the level pack it up along the sill [3x's]
  • checking the dimensions of the window found the center of the frame
  • measured from the center the length making marks at each end
  • then using these marks to find the width of the parkers to go in
  • making sure each one is level tacking them in place
  • then the window was put in place
  • the inside frame was check so it would sit 10mm out [this is for the gib]
  • tacked in place, then 75mm screws were put in top, bottom and middle
  • nails were removed
  • other side was tacked in with a nail
  • packed up same as other side
  • screwed in place
  • check again top, bottom and sides making sure it was all level and square
Then carried on with the wall clading
This time had to work out were the boards were to go by working out the size of the face of the board and by how much it covered the bottom board. Once this was done we chalk lined across the water proofing membrayne and started to put up the weather boardss

Tuesday, 26 June 2012

27th June

Tools used: hammer, clippers, air stapal gun

today was spent on putting up chicken wire across the roof to stop the building paper from sagging.

This was done by rolling out a roll of the wire across the bottom. [first length already done] The second length was rolled out across the entire length of the roof, then stapaled along the bottom run. The sides were snipped. Then 2 of us stretched the wire up to the top purlin and was stapaled. This was repeated the entire length. Then the side were stretched and stapaled.

Then the process was repeated across the other side. Same for the end


Monday, 25 June 2012

26th June

Tools used: radial saw, hammer, 8m tape, drop saw, dog tail, straight edge, level, F clumps, gas nail gun, hand saw, hand plain

First part of the day we started on calculations on the length of the roof clading and the number needed to cover the build.

First we went over the roof over hang / 600mm + 30mm [facia width] + 60mm over hang of the roof clading = 690mm

Then we added this to the run [half the width of 7.2m = 3.6m] = 4.290m or 4290mm
then to find the length [or hypotanuse]  4.290 divided by 20 degrees cos = 4.565m [take of 10mm of the roofing iron sheet to give us 4.555m]

Then to find the area of the roof we took the length of the build 15.5m added .690 [over hang] x's 2 = 16.88m / then the side - 7.2 + .690 x's 2 = 8.58m / x's these together 16.88 x 8.58 = 144.83msq

Then to find the area with the pitch 20 degrees we took 144.83m x cos 20 degrees = 154.125msq [this is the roof area of our build]

Next we worked out the number of sheet required. Each sheet has a cover of 760mm [which means its the width after over lapping the sheet next to it]. We took the length of one side - 16.88m divided by .760 = 22.210 / x's 2 = 44.42m plus 1 full length per end which gives us a grand total of 46 sheets @ 4.555m / off cuts go to opposite side.

We then worked out  the paper quantity. Rolls are 1250mm wide [cover 1m] rolls come in 50msq
50msq x's .8 = 40msq / pitch roof area = 154msq divided by 40 = 3.85 round up to 4 - so 4 x's 50msq rolls of paper.

Rest of the day was spent building. Demolotioning our close couple roof exercise, as well as de-nailing each member. Then went through the build nailing the bottom of the trusses to the top plates. We run a string line and blocks to check the walls were straight, adjusted when required using F clumps to pull any truss down down, then nailed from the bottom when we could and top on the other ones with a gas nail gun.


Last we had to adjust a stud where the kitchen units are going, by cutting with a hand saw no more than half way through the stud [internal part of the bow] then we nailed a member to 1 side [min of 300mm member from the cut - 1 each side] 2 nails at the top / 2 nails at the bottom and 1 in the middle. Then the stud was pushed to straighten. Nailed the bottom off [same as the top part] checked with a straight edge / nail the top of the other member at the top / when checked if straight a wedge was put in the cut / checked again / when straight the bottom part was nailed in / wedge knocked off.
Finished with a hand plain taken any edges off.

     

Sunday, 24 June 2012

25th june

Tools used: drop saw, radial saw, hammer, square, bevel, 8m tape, rule, pencil, level, hand saw

Today we continued with the close couple roof exercise.

We finished measuring the rest of the rafters, as well as marking out were they were to go on the ridge and top plates. The bird mouths were cut out and rafters nailed in place. Then we plumb each end with a brace being put up to keep the roof plumb.

Then we split into 2 groups to work on each end. We had the out rigger end, with the other group on the purlin end.

We were shown how to calculate the raking frame to get the lengths and angles. Then we cut them out by hand, with abit cut at the top so the ridge can set on it.

From here we cut and put in a jack stud to support the raking frame, with 2 other, to support the out riggers.

Then the out riggers were measured and cut and nailed in place, with the flying rafter nailed into the ends of the out riggers.
       

Thursday, 21 June 2012

20th June

Tools used: hammer, router, F clumps, drop saw

Today I finished off the tie on the window lintel, by marking out the out line of the tie then clumping the tin plate around the mark. Routing it out, then nailing the tie in place to set flash.

After lunch we started on the 'Close couple roof exercise'.
1st we measured the length of the frame to get the length of  the  ridge board + the extra 300mm each end for the gable over hang.

Then we were given the angle of 30 degrees + 1m for the run - .013 for half the length of the ridge board = 987 divided by 30 degrees cos = 1.140 / then we added an other 300 for the over hang / 1287 divided by 30 degrees cos = 1.486. This was the length of the rafter.
Then we cut each rafter with a 30 degree angle at each end. Measure down 1140mm using a bevel to mark down for the birds mouth, which was 18mm with the other end running square from this.

We braced it, running a member down from the ridge to the frame to hold it in place.


Sunday, 17 June 2012

18th June

Tools: hammer & nails, gas nail gun, router, 8m tape, pencil, radial arm saw

Safety gear: muffs and boots

The morning session we went over the different parts of a roof again.
Then had to draw up a 3D plan of a man hole in the ceiling, naming all the parts
  • Ceiling joist
  • Trimming joist
  • Trimmer
  • Curtail joist
  • Load bearing wall
The rest of the day was spent on the build. Finishing the purlins along each side, starting with the 2 rib purlins.
I carried on with putting in the last half of the lintel with John. Cut to length and nailed in using the gas nail gun at 50mm in from the side and at 50mm intervals down [skewed] 300mm apart.
Then we put the tin plate on to router out the shape of the tie.