Showing posts with label Roof and trusses. Show all posts

Sunday, 17 June 2012

18th June

Tools: hammer & nails, gas nail gun, router, 8m tape, pencil, radial arm saw

Safety gear: muffs and boots

The morning session we went over the different parts of a roof again.
Then had to draw up a 3D plan of a man hole in the ceiling, naming all the parts
  • Ceiling joist
  • Trimming joist
  • Trimmer
  • Curtail joist
  • Load bearing wall
The rest of the day was spent on the build. Finishing the purlins along each side, starting with the 2 rib purlins.
I carried on with putting in the last half of the lintel with John. Cut to length and nailed in using the gas nail gun at 50mm in from the side and at 50mm intervals down [skewed] 300mm apart.
Then we put the tin plate on to router out the shape of the tie.

Monday, 11 June 2012

12th June

Tools used: hammer, nails, gas nail gun, 8m tape, pencil, radial saw, straight edge, level, calculater
Safety gear: ear muffs, safety boots
 
First hour was spent with Matt learning about how to calculate the pitch and lengths of  roof [trusses]
using sine - cosine - and tangent. There are 4 formula's you can use.

Rest of the day we finished of the rafters for the trusses [at the ends]

Then went through and nailed the end trusses to the outside of the top plates with Z nails [1 each side]
   Z nail

Where the other jack trusses meet we had to chisel out abit of wood so the brace plate would set flash
[1 nail on the bottom / 2 x 25mm galv nails on each side of the plate 8 nails]

Myself and another student went around to check the outside corners were plumb using a straight edge and level. One corner was out so Mark explained the Dwangs  were pushing the stud out. So we removed the 2 dwangs. Put a clump on and screw it up until the wall was straight - using the straight edge to check. Re-cut 2 dwangs . checked they fit properly, then nailed them in using the gas nail gun

Sunday, 10 June 2012

11 June

Tools used: Hammer, 100mm steel nails,8m  tape, pencil, gus nail gun, drop saw
Safety gear: ear muffs, safety boots
  
Morning session was spent going over the different parts of roof framing

Roof board -
Common rafters -
Cliets -
Hip rafters -
Jack rafters -
Ceiling joist -
Cripple rafter -
Out riggers -
Short hip rafter -
Collar tie -
Load bearing wall -
valley rafter - 

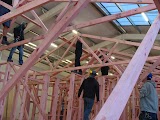
Rest of the morning and afternoon was spent putting up the end trusses. Because they are numdered [marked] on the truss plans we hand to put the right trusses in the right place and also the right distance apart, then tack them off.

Due to a couple of these truss rafters being used, new ones had to be cut using the drop saw

To nail the jack trusses together we used 100mm steel nails [2 top and bottom]
Cam explained if you were putting the jack trusses up by yourself you would nail a block in the bottom of the truss you are going to join the truss too.

Monday, 28 May 2012

29th May

First hour was spent on the different types of roofs
and trusses

Hip roofs - pitched on all sides / apes, ridge runs along the top / hips are where 2 roof plans meet [exterior] / valley, where 2 internal roof plans meet

Gable roofs - where the ends are a triangle section of the wall

Dutch gable roof - this has both parts of a hip and gable roof

Mansard roof - has 2 angled parts to the roof with the side are also on an angle

Skillon roof - often has only a single pitch with both the roof and ceiling aalong the same pitch

Mono pitch roof - where the roof runs on a single pitch and the ceiling runs on the horizontal plan

Then the different types of roof trusses

Common truss - bottom and top cords / the pitch is the angle of the roof / webs are the internal pieces of timber / put together with nail plates

Girder truss - longer than a common truss with extra webs / vertical and angled

Troncated girder truss - has no top, used Hip roofs

Troncated jack truss - small trusses used on a hip roof

 then we continued the  plumbing and nailing off the internal walls [2 x 4inch nails at the top and bottom of each block] and nailed the bottom plate to floor [3 x 4inch nails at 600 centres]

last session was spent on putting up the trusses.

first we put up the troncated girder truss then conected the troncated jack truss, then the first of the grider truss. These trusses were tack in. The process was repeated on the other end.of the house.

then a string line was run between the 2 grider trusses to make it quicker to line up the rest of the grider trusses. As these trusses went up temp braces was nailed along the outside to keep the trusses standing up right. Once they were all up 4by2 was then nailed along the bottom of the trusses to stop any horizontal movement [plus we were told this increased the strength of the trusses by 80 percent].