Tools used: radial saw, hammer, 8m tape, drop saw, dog tail, straight edge, level, F clumps, gas nail gun, hand saw, hand plain
First part of the day we started on calculations on the length of the roof clading and the number needed to cover the build.
First we went over the roof over hang / 600mm + 30mm [facia width] + 60mm over hang of the roof clading = 690mm
Then we added this to the run [half the width of 7.2m = 3.6m] = 4.290m or 4290mm
then to find the length [or hypotanuse] 4.290 divided by 20 degrees cos = 4.565m [take of 10mm of the roofing iron sheet to give us 4.555m]
Then to find the area of the roof we took the length of the build 15.5m added .690 [over hang] x's 2 = 16.88m / then the side - 7.2 + .690 x's 2 = 8.58m / x's these together 16.88 x 8.58 = 144.83msq
Then to find the area with the pitch 20 degrees we took 144.83m x cos 20 degrees = 154.125msq [this is the roof area of our build]
Next we worked out the number of sheet required. Each sheet has a cover of 760mm [which means its the width after over lapping the sheet next to it]. We took the length of one side - 16.88m divided by .760 = 22.210 / x's 2 = 44.42m plus 1 full length per end which gives us a grand total of 46 sheets @ 4.555m / off cuts go to opposite side.
We then worked out the paper quantity. Rolls are 1250mm wide [cover 1m] rolls come in 50msq
50msq x's .8 = 40msq / pitch roof area = 154msq divided by 40 = 3.85 round up to 4 - so 4 x's 50msq rolls of paper.
Rest of the day was spent building. Demolotioning our close couple roof exercise, as well as de-nailing each member. Then went through the build nailing the bottom of the trusses to the top plates. We run a string line and blocks to check the walls were straight, adjusted when required using F clumps to pull any truss down down, then nailed from the bottom when we could and top on the other ones with a gas nail gun.


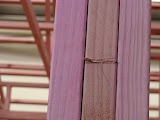
Last we had to adjust a stud where the kitchen units are going, by cutting with a hand saw no more than half way through the stud [internal part of the bow] then we nailed a member to 1 side [min of 300mm member from the cut - 1 each side] 2 nails at the top / 2 nails at the bottom and 1 in the middle. Then the stud was pushed to straighten. Nailed the bottom off [same as the top part] checked with a straight edge / nail the top of the other member at the top / when checked if straight a wedge was put in the cut / checked again / when straight the bottom part was nailed in / wedge knocked off.
Finished with a hand plain taken any edges off.


No comments:
Post a Comment