Thursday, 23 August 2012

20th - 21st - 22nd August

This week was sspent finishing off the wall clading and roof cladding and scribers
 
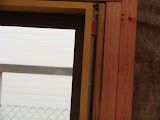
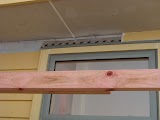
Wall cladding - the final weather board along the top of the windows. Window head flashing had to be put in, then tape along the top edge to weather proof, from there, the weather board had to be cut to fit with bevel edges to join the next one onto.
   
   
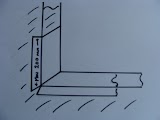
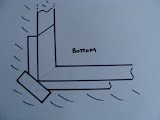
Corners then could be finished off, with the cut back level and primed. Then the facing board put on, finishing with the scribers
   
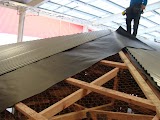
Roof clading was just about finished, with another sheet required. Then the capping can be put up.

Monday, 13 August 2012

14th August

Tools: hammer, bevel, square, jig saw, drop saw, copping saw, ripping saw

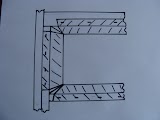
Today we carried on with scribes down the windows and doors. Started with cutting a beveled edge for he bottom that sets on the sill. Then tacked it on the side, marking out the sides to be cut. Checked to see they fitted, cutting any extra out, prime then nailing in place.

Top flashing cut and put in on the top on the window / door


Then we measured and ripped down the weather boards to fit over the flashing and butting into the soffit. Then Matt went through and show how he wanted them cut around the top of the window and flashing

Sunday, 5 August 2012

6th August

Tools: hammer, hand saw, punch, 8m tape, 1m fold rule, square and bevel, radial saw, jig saw


Today worked on the wall clading. Puting up waether boards around the meter box.

       
Also putting packers  around the windows with a packer going all the way up the side to fit the timber frame work around it.


Monday, 23 July 2012

24th, 25th July

Tools:- hammer, punch, level, hand saw, 8m tape, pencil, cordless drill


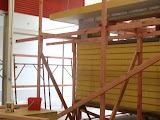
Today helped build the wooden scaffold.


Then carried on with the wall clading. Running a level down the wall, where a stud is, marking down with a pencil, then measuring 40mm up, then marking with a cross. These holes are pre-drilled to stop the sliting of the weather boards when nailing them. The nails were then punched in.


Also helped finish of the soffit. Going into the corner.


Then we started measuring and cutting the sills out. First we measured the window or door frame -20 [for the overlap board on the frame] + 130 [65mm for the board] + 36 [2x 18mm] and + 80 [2 x 40mm]

Sunday, 22 July 2012

23rd July

Tools used: hammer, level [long & 1m], 8m tape, 1m folding rule, radial saw, hand saw, stapal gun, chalk line

safety equipement: ear muffs, safety boots
   
Today I started on the wall clading.
I did between 2 windows, measuring [5 to 20mm of from the inside window frame] and cutting [on the radial saw] priming the ends, then tacking each board up along the chalk line. This was repeated until just below the top of the window frame.


After 12pm were shown how to put a window in.
  • checked the frame was level
  • because the bottom sill flashing has a lip we put packers up in line with the lip
  • then using the level pack it up along the sill [3x's]
  • checking the dimensions of the window found the center of the frame
  • measured from the center the length making marks at each end
  • then using these marks to find the width of the parkers to go in
  • making sure each one is level tacking them in place
  • then the window was put in place
  • the inside frame was check so it would sit 10mm out [this is for the gib]
  • tacked in place, then 75mm screws were put in top, bottom and middle
  • nails were removed
  • other side was tacked in with a nail
  • packed up same as other side
  • screwed in place
  • check again top, bottom and sides making sure it was all level and square
Then carried on with the wall clading
This time had to work out were the boards were to go by working out the size of the face of the board and by how much it covered the bottom board. Once this was done we chalk lined across the water proofing membrayne and started to put up the weather boardss